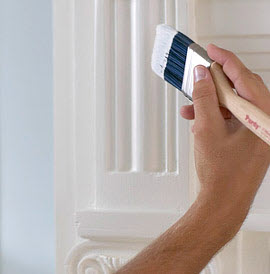
Many homeowners use the spring and summer months to complete as many home improvement projects as possible. The weather outside is perfect for completing yard work, or building up your deck, and even painting around the house. If you’re going to tackle an interior painting project this summer, read up on some expert tips from career painters before you begin to ensure you complete the job as well as an pro!
- Tint the primer. If you’re going to start your own painting project, you probably know that a base coat of primer is necessary. A coat of primer preps the wall to be painted, improves the life of the paint to be applied, and also prevents stains from bleeding through. A trick many homeowners are unaware of is tinting the primer. To do this, simply mix a small amount of the top coat color paint in with the primer. This will help hide any surface stains on the wall, and enhance the look of the final top coat when the project is complete.
- Use canvas coverings. Many people choose to line their flooring and cover their furniture with plastic when taking on a painting project. This can prove to be more of a hassle rather than a help. Canvas is an extremely durable and rip-resistant material that will soak-up any accidental paint spills. Unlike plastic, canvas won’t bunch up as easily or be a slip-and-fall hazard.
- Swap out the ladder for an extension pole. Trying to paint a ceiling while maintaining balance on a step ladder can be trying, and may result in injury. Extension poles are offered in a variety of lengths, and are much safer to use when painting high walls and ceilings. Instead, attach your roller brush to a metal extension pole that has a non-slip grip. This will make your painting job much easier and much safer.
- Wrap up your tools. If your painting project is going to take more than one day to finish, remove as much excess paint from paint brushes as possible, then wrap them in plastic to prevent them from drying up over night. Use multiple pieces to ensure that the brush is wrapped securely and prevents air from reaching the paint brush or roller. This will save you the hassle of having to clean your tools every day, and save time when you start up your project the next day.
- Start at the top, finish at the bottom. Once you’ve cut in the edges of your walls, start painting from the top and work your way down your wall. This will allow you to fix any drips that may fall from your brush during the painting process. Starting at the top gives you the power to fix as you go, instead of going back over what may be already-dried paint.
If your painting project seems to big to handle, call the expert Palatine painters to tackle even the largest of projects. (847)-881-0480.


